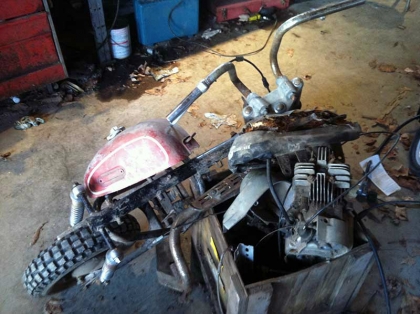
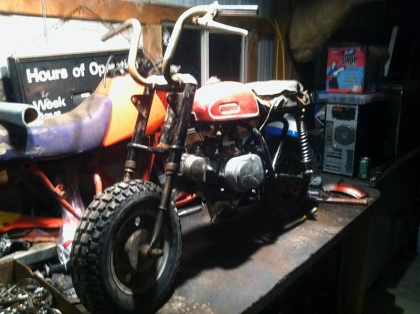
Every spring it seems I have wound up rehabilitating some poor abused mini bike. This year I picked up a Gemini SST 50 on trade for a Kubota ZB600 2 cylinder diesel from one of my buddies. He will put it to good use in a lawn mower and now there’s not 400lb’s of dead weight eating up floor space in the barn, it was going to go in a bio-diesel Harley project but I’m happier just to see it gone. This is not going to be a super expensive pit bike build/restoration, just an example of what can be done on the cheap, and to show that nothing is ever beyond saving. So this is what I got, a pile-O-Gemini:
The bike was pretty rough, but came with motor, seat, tank, rusted off exhaust, parts of random other bikes, one good shock and one broke shock (those are Honda donors on it), and half an air filter canister. Since it was still late February when the little Gemini showed up and the barn was way to freaking cold to be out working in I slowly started the parts hunt. First off I gave up on using the stock motor for two reasons;
1. I don’t like two strokes.
2. The original motor had its shift linkage ate off.
Neat fact, the Gemini mini bikes were imported into the US back around 69-73 by American Steel from the Shin San Tong Co. Inc in Taiwan. The little two stroke motors they use are knock off copy’s of the 1964 Yamaha YG1 motors since the company was actually a motor supplier for Yamaha. Most parts from the Yamaha will work on the Gemini motors. These motors are slightly odd, the shift linkage is under the flywheel cover on the outer side of the drive sprocket. It pushes and pulls a rod that runs through the center of the sprocket when you are shifting. Since this big pile of fragile cast aluminum is hanging over top of your drive sprocket, if the chain decides it wants to hop off guess where its going? Around your shift linkage and then ripping everything out the back of the flywheel cover in a nice big pile of broken parts. This is why the motor is not going back on the bike.
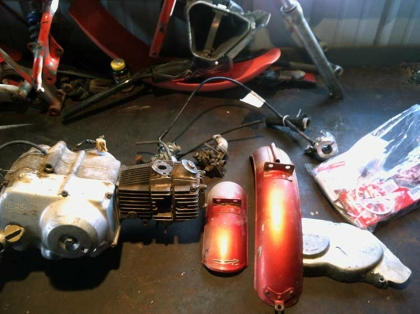
So here’s the parts, instead of the lil Yah-me clone motor I’m going to be shoving a Honda Z50 engine into the bike. Four stroke, auto clutch, and tons of aftermarket go fast goodies and parts if they are needed. The motor was originally from my 71′ K2 Z50 that I put a Lifan in a while back, and it did run back then. But it smoked really bad, leaked oil from every seal, and the kickstarter shaft is stripped. The chrome shocks on the Gemini are ones from a 74′ Z50 that I snagged off Ebay for $14.00. The Fenders are actual Gemini Fenders (in the correct color, and matching primer!) that came from Ebay, $9.00 a pop. And since I did not have a complete carb for the Z50 motor I picked up a newer 98′ XR50’s carb, cable and throttle for $30 bucks again on Ebay. The bag O goodies are random missing gaskets, bolts, and bits that came from Bike Bandit in order to put the motor back in some what respectable shape.
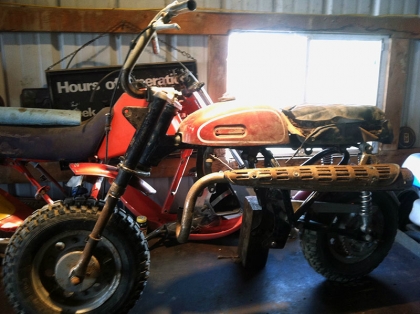
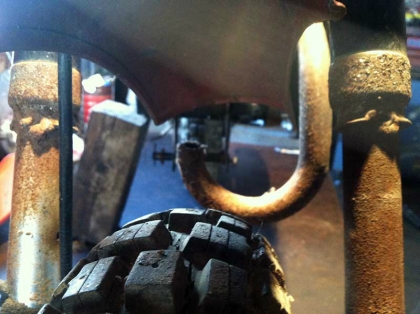
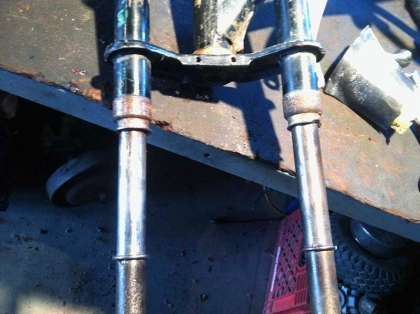
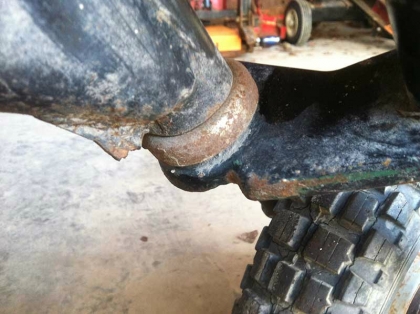
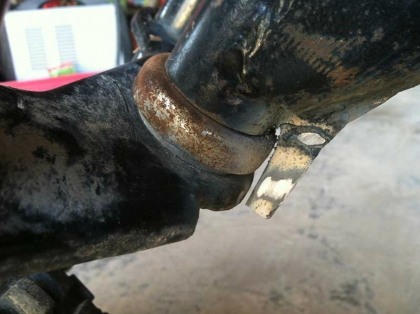
I mocked everything up real quick just to see what the little Gemini looked like with most of its parts on and its really not that bad looking of a little mini bike. There are a few issues with the frame that will need to be taken care of. The first being that some retard thought it was a good idea to weld the forks shut.
I have no idea why someone would have done this. I can understand if they were bent, sticking, or had a broke spring, but after unscrewing the legs there was nothing wrong with them. I took the legs to the grinder and cleaned up the rust and old welds. Afterwards greasing them and putting them back on the bike.
They both work with no issues… I just don’t understand people sometimes.
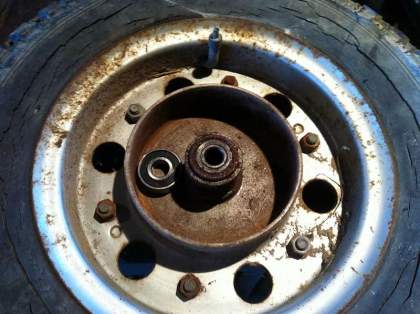
So while the forks where off I popped the wheels and hubs off to take a peek at them. Wheel bearings are all shot, this guy and one on the rear don’t even spin any more. The new ones of a Z fit, but I’ll wait to swap those out when I order some new tires. It will be easier with the rims apart to drive the old bearings out.
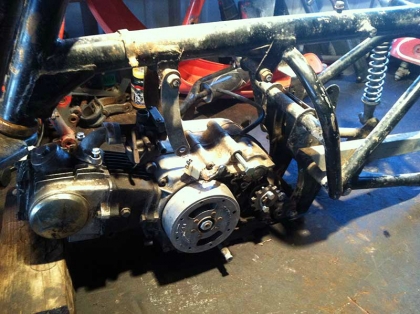
The Honda Z50 motor is going to take some persuading to make it fit in the Gemini. The drive sprocket on the original motor is about 2 inches higher then the Honda motors, and the head is a lot shorter then the Honda’s. Not to big of deal, the actual frame width is about the same so the Honda motor will fit in the frame gap with no issues, its just going to take some sawzalling to get it back far enough so the fender and wheel clear the head.
After stuffing the wheel back on and mocking up the fender I think this is going to work but it was getting dark and cold in the barn and I called it a night.
Day 2
Today’s goal was to get the motor stuffed into the frame and actually bolted down. But first the bike needed to have its fork stop put back on, the handle bars kept wacking me in the head every time the motor went in and out of the frame. On the last time it clocked me right in the side of the ear, which was the last straw.
Found some stock steel that was kicking around and chopped a small chunk off, then ground both faces flat and welded the new fork stop in.
So now that the handlebar’s were restrained I moved back to the motor. The little Gemini’s frame is a lot more stumpy then a Honda z50 which means that the motor needs an extra two inches clearance by the front wheel so it will fit. In hind site the smart thing would have been to chop and stretch the frame a couple of inches. But I decided to keep grinding and cutting away at it.
There’s now an alarming amount of steel missing and I’m fairly sure that the frame is no longer structurally sound. But reinforcing it is a project for another day, today that motor was going in. Any cross members lost where considered casualties of war.
After all that the motor finally, just barley, fit into the frame. Tomorrow I’m going to beef the cross members back up and reinforce the lower motor mount holes by welding some washers around the holes. It would probably work as is, but no sense cutting corners on this. Front fender clearance may still be an issue but the frame has no more clearance to give without cutting all of the center section out.
Day 3
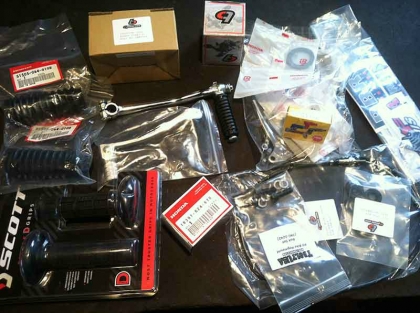
Finally got a new order of parts in, there was a lot of little stuff that was needed to finish putting this together, and most of it could have been skipped but I decided not to cut too many corners.
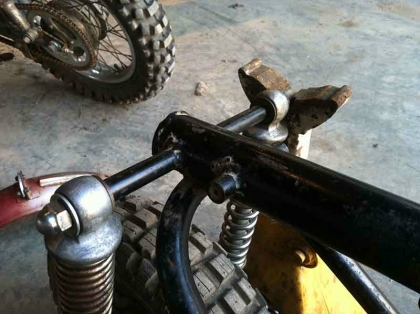
Lots of neat things there, a new coil, shifter bits, etc. Now moving back to the frame. The back section still needs some bracing.
You can see that the shock mounts just sort of hang out there, I would hate to be on it after coming off from a high jump. Not that a 50cc bike can get much air, but dang would it hurt to have one of those shocks break off and come jabbing at you up through the seat pan.
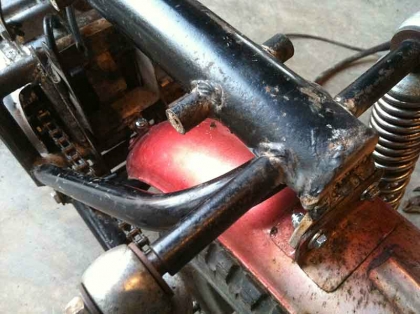
Now on to the fender. Ended up cutting a large washer in half and welding it to the frame along with the one cross member I had cut off to ad the fender mounts back. It actually ended up turning out better then I thought it would.
And here is some new steel that I added back to the frame to help make everything stronger after cutting that 2 inches of frame out. Not the prettiest thing to look at but it will disappear under some heavy paint.
Â
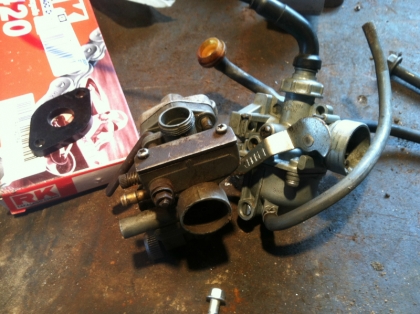
The new carb that I picked up was a mess. The inside of that thing was very, very, nasty. But here It is next to the original carb that was missing its slide barrel, little bit of difference but they are both very small goofy little carbs.
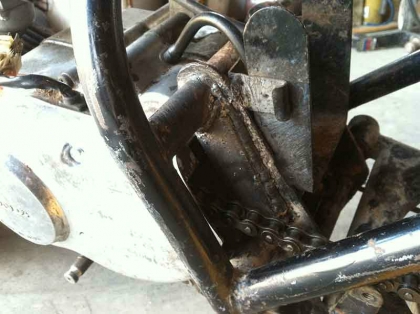
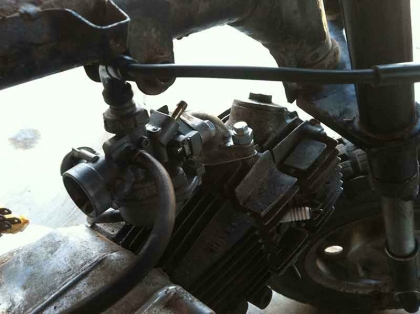
The motor since it was stuffed so tightly into the frame was having issues with the carb clearing the old front motor hanger on the frame. There is supposed to be a heat spacer on the intake to help keep the carb cool but there was no way, just not enough room. Even with the spacer off it was clear that the front mount had to go.
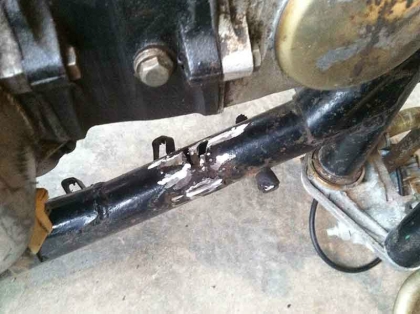
Ripping the mount off left a couple of holes in the bottom of the frame. While it would be nice to have a bike that folded in half for storage, I decided to play it safe and seal the scar shut.
Now with the frame back together on went the front fender.
Had to flip the poor fender around backwards in order to have enough room for it to clear the head. Its a very tight fit but its as good as things are going to get.
A Z50 gas cap gasket fit the cap on the Gemini’s tank which will make life a lot nicer. Sloshy messy gas caps are the worst.
So getting very close to having something that runs. Its actually a little more complete then this right now but I don’t have any newer pics. It did run for about 30 feet last night when a couple of my buddies were over. The points need a good cleaning as spark is coming and going on it. Muffler parts are on order as well as footpegs and a kick stand. Once those show up its just a matter of trying to get it running and reliable. And if that works out then I’ll try to track down a headlight bucket for it and a kill switch. 🙂
Annnd Continued:
So the little Gemini has been all back together for a while, but I’ve been neglecting to update this, so here we go.
no images were found
The motor did run, but not very well. So an order was placed for the TB 88cc big bore kit for the little z50 motor and I started tearing into it.
no images were found
The boar was pretty tight but there’s no replacement for displacement 🙂 On the left the shiny new 88cc kit, and on the right the stock 49cc cylinder and piston. The size difference is quite a bit, but I guess it is 39cc larger.
no images were found
This kit was for use with the stock head and carb, so apart it came for cleaning and a fresh valve grind.
no images were found
Apparently the exhaust valve was burnt and pitted which is why the motor would hardly run. But the bore kit sounded like fun and didn’t cost all that much anyways. Shiny new valve faces and seats.
no images were found
no images were found
So here she is all together. Not the prettiest looking mini bike but the restoration will have to wait until a new old stock seat cover shows up on ebay. I’m not sure if it was covered earlier, but the exhaust was fitted by hacking the header off from a 2004 CRF50 muffler that came off ebay for 12 dollars and welding it directly into the SST’s old pipe (its kind of fuggly). I also managed to pick up a headlight and bucket for not much, but its not wired into the stator yet.
no images were found
no images were found
So final verdict, its a riot. It rides just like a soft tail z50 and is a blast to fling around the track or through the woods. With the pipe and the 88cc TB kit (stock carb was rejetted) it sounds very throaty for a little bike and has gobs of torque. It pretty much will just pick the front end up in any gear if the throttle is bumped and I’m starting to get worried about the poor little auto clutches health. It should calm down if its re-geared, with the stock 50 gearing it only hits about 25mph. My K2 z50 with a 75cc kit will do 45mph so with the right sprocket combination it should have no problem matching that, although it may spread the gears out a little too wide. As it currently is, its a hill climbing monster and is quite fun. Hopefully a few of the missing parts will turn up on ebay and maybe next year it can be torn down and restored like it deserves. If you have any basket case Gemini’s lying around and your not afraid of a little work, stuff a Honda motor in it and get them back in the dirt. They pretty sweet little bikes.

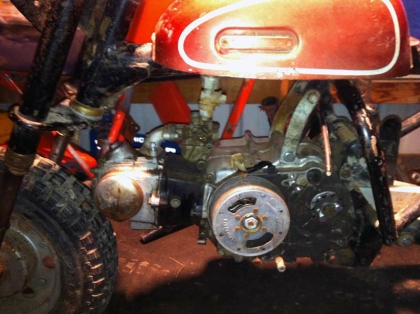
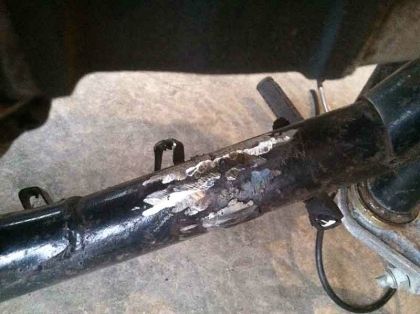
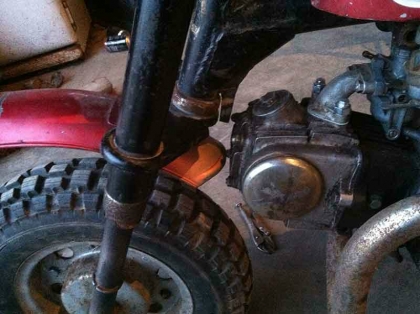
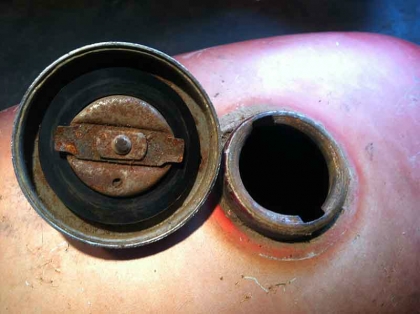
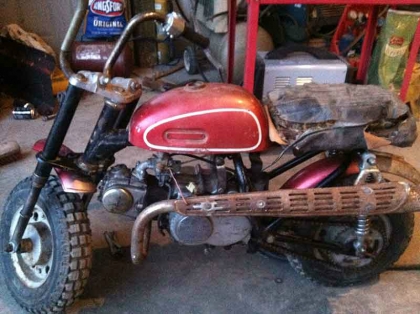
Did you ever complete the build? I have quite a few Gemini’s and have been thinking about the Honda swap. Great pictorial.
Yup, it worked out pretty darn good. I think I ride the Gemini now more then my K1 Z50, those rear shocks are nice! I’ll make sure to update this soon with some completed pics.
when i was a kid my dad would ride us around on a gemini. if you have any parts or the extra motors i would love to buy them at a fair price. i finally got a gemini last year and am working on it as i get time. any extra motors or pieces i would love. thanks a lot. my number is 410 394 9000
Hi Ronny, the motor and a few other bits that were not used in the build ended up getting scrapped and at the moment I don’t really have any remaining parts. However, if you need engine parts 1964 Yamaha YG1 parts should fit the motor, and for the body/frame of the Gemini you may be able to cobble in Honda z50 parts. I think that the from forks/springs should interchange and maybe the wheels/hubs with slight modification. I have not tried the wheels however. Although parts are few and far between Ebay is going to be your best friend in locating parts. If it helps I think the Gemini was also sold as the Maverick mini bike as well. Best of luck with your project 🙂
Hi mate I just wanted to know do these bikes have compliance plates for Australian roads?
Thanks
Not sure on that Joel, I’m over in the states. I know that they came with headlights and taillights, but I’m not sure how/if you could get one plated there. I think I remember seeing some article about a guy in Melbourne that had one on the road though, but I cant find it.
Was also called an SST. I had one of each, a red one and a green one for my kids. My daughter never rode hers much, stuck it in the garage attic. I still have it. My son lifted some parts for his. I had it running a while back. Needs a shock and a seat. Still have the owners manual.
Phillip, do you have any leads on parts for these bikes? I need 2 seats.
Chris, if you can’t locate a factory seat other then parts kicking around on Ebay, the seats off from a K1/K2 Honda Z50 may bolt up, or at least fit with some light modification. They both have similar mounting brackets but I never tried to swap the two around to see for sure.
Never tried it but was told the Honda seat does not bolt up.
Hi Chris, knowing you had to do quite a bit fab work to get the engine to clear on the front, how close were the engine mount bolt pattern between the Gemini in comparison to the Honda.
Thanks,
Rodney
I will have to drag my 71′ z50 out to check on the seat size, but I’m fairly certain it can be forced on there with a bit of work.
Regarding the engine mount, it is a tight fit to get the z50 in there and it does involve a heavy trim to the engine mount and some welding.
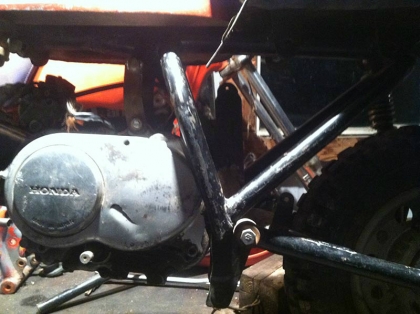
There are three mounts, the straps, the middle long bolt through the upper transmission case, and the bottom long bolt through the transmission case. The straps worked fine, the middle if I remember just needed some washers to snug it up, but the bottom in order for the engine to clear requires a lot of frame trimming.
http://www.somethingthatdoesntsuck.com/wp-content/gallery/random-stuff/gsideframe.jpg
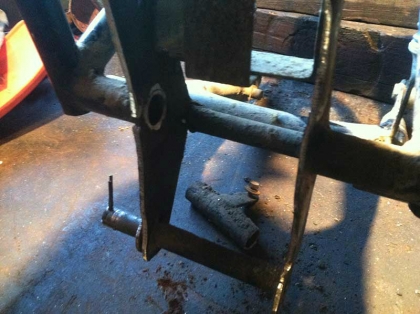
If you look in the above link, down under the engines sprocket you can see the frame kind of cradles under the engine in a curve, like a backwards letter “C”. For it to fit, you basically have to cut that off, so its just straight up and down. There is a cross pipe down there to hold the two “C” sides together that also has to be cut out.
http://www.somethingthatdoesntsuck.com/wp-content/gallery/random-stuff/gframe.jpg
This is the frame after cutting. Notice its now a 90 degree up and down surface, and if you look in the middle of the picture you will see some shiny metal, and on the bench under it is a chunk of pipe that used to be there that was cut out.
You have to cut that center cross member out so the back of the transmission can clear, and then re-weld it further back, near where you cut it out to stiffen the frame back up. The lower mount needs some new holes now its cut back too, but not really a problem. It looks bad but if you have a welder, hacksaw/sawzall, drill and grinder it shouldn’t take more then an hour or two to have it done.
There is not a lot of clearance though from the front of the motor to the tire, so bigger motors may not clear the tire. Mine has a standard z50 motor with a TB 88cc bore kit on it, and the jug was slightly longer then the stock motor and the tire does scrub the wheel on full compression of the forks. It rarely happens when out putting around but pushing it hard around a track really makes it noticeable.
I have a couple of Gemini 80 frames and have been contemplating a 4 cycle swap but was looking at one of the larger engines. Pretty sure I have a little more clearance on the front side but was really curious about the fabrication on the mounting points. Thanks so much.
Rodney